
Today is a little known holiday called Make-A-Book Day. Apparently it’s always the Thursday of National Family Reading Week, which is always the first week in May. Shocked you didn’t know this? Don’t be. Neither of these book holidays is exactly celebrated far and wide. You have to scroll through several pages about “World Book Day” before you find anything on Make-a-Book Day.
But, isn’t it kind of fun being the person who knows about an obscure book holiday? It’s like knowing a secret.
It also just so happens that my daughter finished a book-making badge for girl scouts recently. I wrote a little about it in a previous blog that focused more on her event and how we destroyed books in front of a library (I know! Sacrilege!) than actual book making.
Therefore, my daughter, who is 11-years-old, kindly agreed to write a blog on DIY book-making based on all she learned. If she can do it, so can you!
See below for steps on how you can make a very pretty book like the ones we made! It’s surprisingly easy and can also make a great DIY gift! (Maybe for Mother’s Day. Just a suggestion for those of you who have mothers or children who would like to do something personal for their mothers.)
—————————————————————–
Guest Blog: DIY Book Making by Ella
Hi! I’m Ella! Today you’ll be making books with me! These books are very simple, staple bound ones. Not all books are stitch bound. Staple bound books (saddle stitch) are actually quite common. Some examples of staple bound books are the Little Golden Books!
Here’s how you do it!
Step 1: Gather your materials.

Materials needed:
- Scrapbook paper (preferably colorful with unicorns) for your cover
- Bone folder (optional)
- Cardstock paper (or some sort of plain paper that is a little heavier than printer paper. In a pinch printer paper will be fine too.)
- Staples
- Pushpins (preferably unicorn shaped)
- Decorations (more unicorns would work here too)
- Butter knife
[Mom side note: I apologize for the excessive reference to unicorns in this blog. They are a bit of an obsession in my house. If you have an obsession with something else – puppies, Star Wars, pizza, just replace the word “unicorn” with your obsession while you’re reading. :)]
Step 2: Measure and Cut it!
Take your colorful (unicorn filled) scrapbook paper and lay it under the plain paper to measure.
TIP: Use scrapbook paper that is at least 12 x 12 inches so it’s easier to cut it to size.
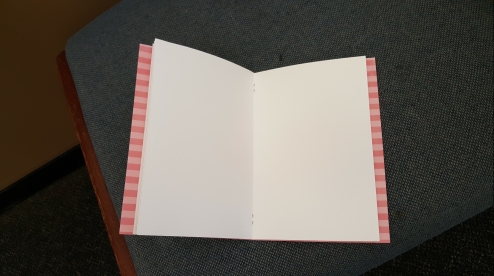
Cut off the appropriate amount from your scrapbook paper so its size is in line with your plain paper, unless you want a book cover that’s bigger than your pages, like the one done by mommy below.
TIP: If you have a fancy paper cutter this works better. If not, try to use a straight edge. In a pinch, regular scissors will work too.
Step 3: Determine Length
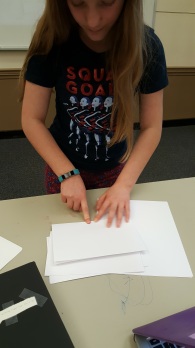
Determine how many pages you would like your book to be. The papers will be folded in half, so take out half the number of pages you want. If you want a book that’s 12 pages, like mine, take out 6 plain pieces of paper.
Step 4: Folding Time
Fold over each individual paper “hamburger style.” For a cleaner fold, use a bone folder. Bone folders are these little smooth tools made of bone. They make it easier to fold paper!


Step 5: Place each folded paper inside of the other.
When you open it up, it should easily part down the middle. If it doesn’t, sorry.

Step 6: Make the cover
Now take the scrapbook paper and repeat the same process. Fold over your colorful unicorn scrapbook paper “hamburger style” and then put all the folded plain papers inside of it.
Step 7: Prep it for binding
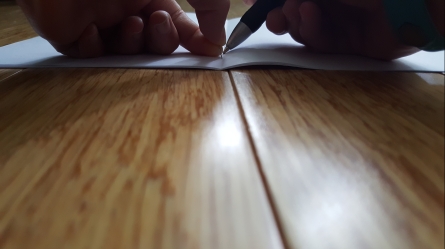
Open your book up in the middle. Make four holes with the push pins in the center crease of the book. Two holes should be spaced out the length of your staples near the top of the papers and the bottom. Make sure the holes go all the way through the book.
Step 8: Bind it!
Flip your book over (cover side up), while still keeping everything in order. Push the lone staples through the holes you created. Don’t poke your fingers, I did that and it hurt.
Step 9: Finish up
Flip your book over again (cover side down) and push down the metal parts of the staples that stick up with a butter knife or a book.
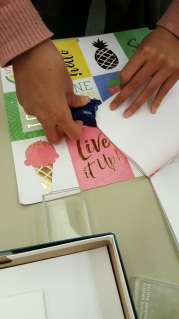
Step 10: Decorate!
You can use a tool to cut the corners so they’re rounded or add stickers or other embellishments.
TIP: We used Tutti Frutti scrapbook paper from Joann’s Craft Shop, but you can use whatever you want. Tutti Frutti had pretty colorful stuff and shiny stars and pineapples.
Step 11:
Show your awesome book to everyone because it’s beautiful and you made it. Good job!


May 11, 2017 at 9:44 am
I say yay for unicorns 🦄!!
LikeLiked by 1 person
May 11, 2017 at 3:00 pm
I know. They’re the best right?! People who don’t love unicorns are just crazy.
LikeLiked by 1 person
May 12, 2017 at 8:57 am
Yes….mad I tell you, mad!
LikeLiked by 1 person
May 11, 2017 at 10:09 am
Reblogged this on John's Notes and commented:
Whether your are young or old, taking the time today to make your own book is a great idea.
LikeLiked by 1 person
May 11, 2017 at 10:21 am
What a fun project! Thanks for the instructions 🙂
LikeLiked by 1 person
May 12, 2017 at 5:10 pm
What sort of camera is this? That is certainly a decent top quality. http://wlodb.com/users/185209
LikeLike